
1234567891011121314151617181920212223
 1234567891011121314151617181920212223
1234567891011121314151617181920212223242526272


 1234567891011121314151617181920212223242526272
Hi Smogon!
First off, I apologize for all of the suffering I've been causing on the ladder by introducing Setup Boosting-based fat teams. I understand that this strategy is aggravating to face and only worsens the match-up issue we already deal with on a regular basis. That being said, I'm honestly surprised that there have been a few dominating forces on the Setup Boosting spectrum with looming eyes in the darkness, waiting for a decided player who believes in what they are capable to bring to the table and not disregard them just for how complicated it seems to handle them in hard-fought battles. For what they're worth, Setup Boosting pokemons have always been one of my favorite pokemons and their unique types/stats/abilities have always been intriguing to me.
The Team


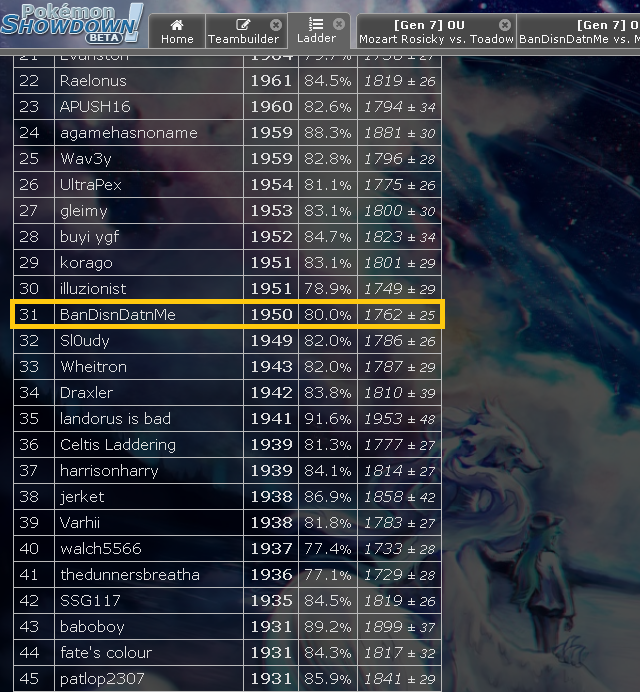
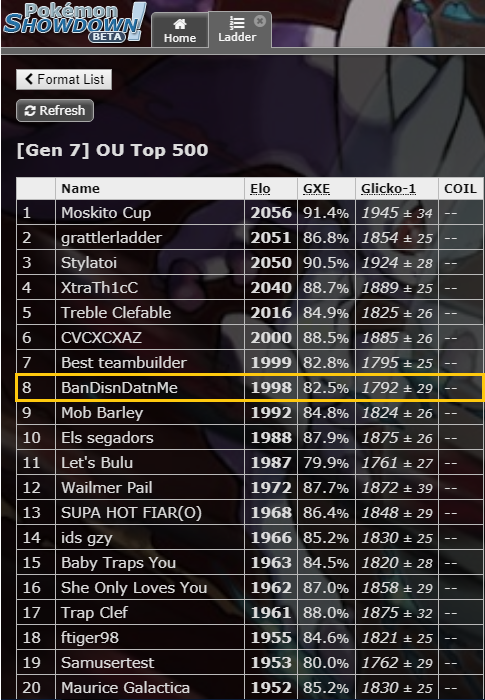
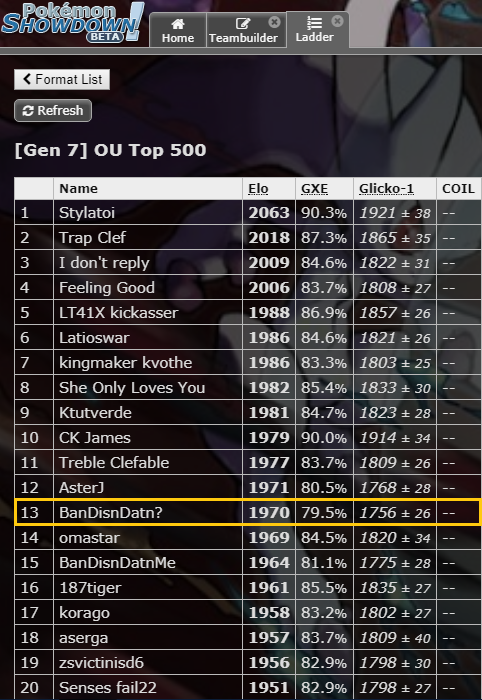
This team fares pretty well against all kinds of teams ranging from full stall to cancer rain teams to hyper offense, while being particularly effective against both TR offense and Balanced teams without Dark types. Like any team it has a fair share of weaknesses and most likely has room for improvement, so rates and feedback are always appreciated. Even with the team's shortcomings, I've managed to stay on high ladder for a chunk of time and get many accounts to 1900's. I'd even go far enough to say that the combination of Tapu Koko Screens, Espeon Electric Seed, Necrosma Rest, Clefable Stored Power + Charge Beam, Mega Charizard X Belly Drum and Quagsire Waterium Z is borderline broken, but that's a discussion for another time.
Team Building Process
-------------------------
Team Breakdown
-------------------------

Mega Charizard X

Item: Charizardite X
Ability: Tough Claws
EVs: 252 Atk / 4 Def / 252 Spe
Nature: Jolly (+Spe, -SpA)
• Flame Charge
• Roost
• Belly Drum
• Dragon Claw
This Hyper Offensive pokemon metaphorically signals the End of Days; the rest of the team takes advantage evenly from its capabilities. Its ability Tough Claws and high attack makes it a strong wallbreaker, but taking into consideration that it gets outsped by commonly used Choice Scarf users such as Greninja, Keldeo, and Garchomp, as well as many offensive Pokemon before getting the +1 Spe boost from Flame Charge, only makes you wanna wonder if it's worth the mega slot.
Roost - Improves Charizard's longevity, eases setup, and allows it to stay out of range of revenge killers.
Flame Charge - You will often choose to set up Flame Charge depending on the makeup of your opponent's team. Flame Charge works best against offensive and slower, bulkier teams without Unaware users.
Dragon Claw - Reliable secondary STAB move that hits most Pokemon that resist Fire for solid damage and has the benefit of not making Mega Charizard X suffer recoil damage, unlike Flare Blitz. While situational,
Belly Drum - While situational, maximizes Mega Charizard X's Attack stat by raising it to +6 stages, that combined with the +1 stage gained from Flame Charge, the supportive Reflect and Light Screen screens, Dragon Claw as a safe option to use against Water-types and Roost to increase survivability and extend your sweep, can only make a legitimate argument about it being paired with screens is what's next.
EV Spread - Maximum Attack investment is used to hit as hard as possible, and a Jolly nature is used to outspeed Jolly Choice Scarf Landorus-T, Jolly Choice Scarf Excadrill, Choice Scarf Tapu Lele, and Modest Choice Scarf Keldeo. This spread also allows Mega Charizard X to outspeed neutral-natured base 100 Pokemon such as Mega Gardevoir and Mega Medicham as well as most Kyurem-B before a Dragon Dance.
Tapu Koko

Item: Light Clay
Ability: Electric Surge
EVs: 252 HP / 4 Def / 252 Spe
Nature: Timid (+Spe, -Atk)
• Reflect
• Light Screen
• Taunt
• Defog
Tapu Koko's purpose on this team is to provide the team with the defensive boost they need by setting up screens and patch up the team's weaknesses to Toxic Spikes, Roar/Whirlwind users and Taunt/Encore users since it runs Taunt and Defog. Its swiftness to set up screens, hazard removal, and prevent opposing Taunt/Encore users from crippling the sweepers, makes it a go-to facilatate stuff for the Setup Boosting pokemons on the shelf.

Quagsire

Item: Waterium Z
Ability: Unaware
EVs: 252 HP / 252 Def / 4 SpD
Nature: Relaxed (+Def, -Spe)
• Aqua Tail
• Recover
• Curse
• Amnesia
Quagsire is my most important line of defense against potent special wallbreakers including Zard Y and LO Tornadus-T. The utility it provides between Boosting moves and Boosting negation in Unaware makes it an essential member of the team for shutting down opposing Setup Boosting pokemons, as well as picking off frail attackers like Weavile, Alakazam and Gengar when it's not fully boosted. Although Waterium Z may seem redundant unlike Leftovers, it gives Quagsire a way of punishing Mega Gyarados, Ash-Greninja, and almost anything else that would normally make Quagsire a dead weight. Increasing your Defensive stages at +6 on opposing offense teams makes them incredibly easy to wear down. This set notoriously cruel to opposing TR teams and teams without Grass type pokemons, usually turning the match-up in my favor.

Clefable

Item: Leftovers
Ability: Magic Guard
EVs: 252 HP / 172 Def / 84 SpD
Nature: Bold (+Def, -Atk)
• Stored Power
• Soft Boiled
• Cosmic Power
• Charge Beam
In terms of negating Taunt, this set of Clefable is an absolute necessity for Status condition and Recoil Damage control and keeping momentum in the presence of common Taunt setters like Tapu Fini, Greninja and Heatran. Considering the majority of Steel type pokemons with the exception of Magearna, Heatran and Magnezone are physical attackers, I figured a physically defensive spread would make Clefable's job as easy as possible. This set has to facilitate Boosting in the face of strong special attackers Taunt users, all while needing partners that can take on these powerful threats if Clefable is in distress. The Stored Power Clefable hype seems to have died down and people are beginning to realize how much of a nuisance Clefable is with Stored Power/Charge Beam.
Stored power - Gets stronger and stronger as Clefable obtains boosts, becoming incredibly powerful and eventually OHKOing most of the metagame.
Soft Boiled - Keeps Mega Latias healthy over the course of a match, allowing it to survive powerful hits like Landorus-T's Supersonic Skystrike and Mega Pinsir's Return.
Cosmic Power - Boosts Clefable's Special Attack and Special Defense by one stage each, preparing it for a sweep and making it near unbreakable after several boosts.
Charge Beam - Mostly used for strengthening Stored Power and neutral coverage to hit Steel- and Dark-types such as Greninja, Celesteela, and Jirachi while also hitting Pokemon such as Mega Pinsir, Mantine, and Tornadus-T harder initially.
EV Spread - Leftovers increases Clefable's longevity and allows it to check many Pokemon much better. The given Special Defense and HP investment along with a Calm nature allow Clefable to, most of the time, avoid the 2HKO from Mild Life Orb Kyurem-B's Ice Beam, Thundurus's Thunderbolt, Mega Diancie's Moonblast, and Mega Manectric's Thunderbolt. The given Defense and HP investment allow Clefable to avoid the 2HKO from Jolly Mega Lopunny's Return, Latios's Psyshock, and Jolly Mega Gyarados's Waterfall, as well as the OHKO from Choice Band Scizor's Bullet Punch.

Espeon

Item: Electric Seed
Ability: Magic Bounce
EVs: 252 HP / 252 Def / 4 SpD
Nature: Bold (+Def, -Atk)
• Stored Power
• Morning Sun
• Calm Mind
• Dazzling Gleam
Espeon is my magic bouncer of choice, as it counters most common hazard setters such as: Heatran, Ferrothorn and Landorous-T. It seems that standard and common Heatran teams are fully prepared to deal with Espeon, whether by being paired with Ash-Greninja or running Firium Z. In the latter situation, Espeon has nothing to fear and becomes a Dazzling Gleam-spammer on Dark type pokemons. When I am forced to use Dazzling Gleam on Dark type pokemons, I can get the kill while leaving Espeon in distress so that the next member of the opposing team gets to reliably revenge kill Espeon, often clearing a path for Necrosma to do whatever it wants now that the opposing team doesn't include a Dark type pokemon. Espeon is also a reliable check to Magma Storm Heatran and plenty of other physical and special attackers Hippowdon and Magearna. Considering my team cannot simply plow through opposing stall, Magic Bounce support is an absolute necessity making it very difficult for the rest of the team to be worn down. Espeon in itself is actually a fairly decent stall-breaker with nothing more than an uninvested Stored Power.
Stored Power - Allows Espeon to OHKO Mega Pinsir after two boosts.
Morning Sun - Great move to recover any HP Espeon lost due to residual damage and allows it to stall out opposing special attackers.
Calm Mind - Boosting move of choice, as it allows Espeon to boost its Special Attack and Stored Power's strength simultaneously. It also has the nifty bonus of making Espeon more specially bulky, and if it is passed a few Defense boosts, it becomes extremely hard to take down.
Dazzling Gleam - Gives Espeon a way to check Tyranitar and hit every Dark-type in OU at least neutrally.
EV/IV Spread - The EV spread provides Espeon with as much physical bulk as possible, as it will have to switch into Pokemon like Hippowdon and Skarmory to avoid phazing moves.

Necrozma

Item: Chesto Berry
Ability: Prism Armor
EVs: 252 HP / 64 Def / 192 SpD
Nature: Calm (+SpD, -Atk)
• Stored Power
• Iron Defense
• Rest
• Calm Mind
Although the team is primarily built around Setup Boosting, the rest of the team benefits equally from Necrozma's stats and ability. For example, common threats like standard Excadrill Hazard Setter, Greninja Sash Lead, Mega "unresisted stab" Pinsir, Latias CM and Gengar LO would otherwise be difficult to wall. Other common threats such as Mega Mawile and Mega Alakazam have to choose between Dark/Ghost coverage and/or setup moves which means that my team would be able to handle any given set. I chose Chesto Berry/Rest over Leftovers/Moonlight, and I believe the latter option is too situational considering the structure and weaknesses of the team. The most common terrain setter at the moment is Tapu Koko, who also happens to be one of the best Taunt users in the tier, thus mitigating Necrozma's ability to deal with Tapu Koko regardless. Tapu Koko and its ability Electric Terrain, however, is really the only prevalent downside to running Chesto Berry, though seeing Tapu Koko on the opposing team doesn't necessarily make Necrozma useless. More often than not, Chesto Berry allows me a free turn to have Necrozma reinvent itself. Furthermore, Chesto Berry ensures that my HP are back to 100 which eases up setup boosting.
Stored Power - Stored Power is Necrozma's sole attacking move, allowing it to hit harder with every stat boost from Calm Mind.
Iron Defense - Forgoes coverage in order to boost Necrozma's Defense, making it nearly impossible for boosting physical attackers to break through it, particularly Swords Dance Bisharp and Dragon Dance Mega Charizard X.
Rest - Rest gives Necrozma a form of instant recovery that not only heals it to full HP but also removes any status conditions.
Calm Mind - Lets Necrozma hit harder and set up freely versus opposing special attackers.
EV/IV Spread - 252 HP EVs and 192 Special Defense EVs, in conjunction with a Calm nature, maximizes Necrozma's special walling prowess. While this may seem like a futile attempt at making Necrozma as bulky as Chansey, it actually allows Necrozma to handily wall various special threats, such as Life Orb Gengar and Greninja, and eventually defeat them.
-------------------------
Threats
-------------------------

Ash-Greninja
I normally don't allow Greninja to transform into Ash-Greninja, but if by any chance it does, make sure to gamble pretty well the Screen/Setup Boosting gimmick. Most of the times, Ash-Greninja will be choice-locked into Dark Pulse, which clefable can certainly take advantage of and set up boosting . Quagsire can handle Ash-Greninja when already augmented by +2 stages os special defense. Espeon can also handle it behind screens by using dazzling gleam. Charizard X can also dispatch Ash-Greninja if it has its Spe stage augmented. All in all, Clefable is the one to be sent out to make front to Ash-Greninja.

Sword Dance Kartana
I highly recommend to keep Necrozma on the shelf because it can potentially cripple Kartana and disrupt its augmented attack by using Iron Defense. If Kartana is being coupled with a Grassy Terrain Tapu Bulu, your best asnwer is to set up screens beforehand, this way you can set up Iron Defense as well as your Stored power benefits from the boost and so that you can wear down kartana due to its lackluster Special Defense.

Taunt Mega Gyarados
In this case, it is suggested that you manage to make as much damage as you can to shorten Mega Gyarados's HP, so that you cripple Mega Gyarados with moves like Charge Beam from Clefable, Dragon Claw from Mega Charizard X. Once all of that has passed, in a 1v1 match the pokemon to switch in to is Quagsire, as its 252 HP / 252 Def investment and its Boosting move Curse would allow it to wall Waterfall-spam so that Quagsire can pick off Mega Gyarados with ease using Waterium Z Hydrop Vortex. Espeon would be useless against Mega Gyarados as Mold breaker Taunt gives the opposing Mega Gyarados the jump on Espeon.

Muk-Alola
The way I handle Muk-Alola is I would normally send out Tapu Koko and try to set screens up. After that, the Mega Charizard X Belly Drum set would get the job done. Other way to finish Muk-Alola up is to take advantage and set up boosting on Clefable as Magic Guard negates Poison status condition.
Replays
Mega Charizard X Belly Drum Offensive prowess [XX Juggernaut]
https://replay.pokemonshowdown.com/gen7ou-728271630
https://replay.pokemonshowdown.com/gen7ou-728273644
https://replay.pokemonshowdown.com/gen7ou-728291812
https://replay.pokemonshowdown.com/gen7ou-728282433
Necrosma Chesto Berry Rest [A flight of fancy]
https://replay.pokemonshowdown.com/gen7ou-728277261
https://replay.pokemonshowdown.com/gen7ou-728277750
https://replay.pokemonshowdown.com/gen7ou-728284805
https://replay.pokemonshowdown.com/gen7ou-728304985
Clefable Stored power/Charge Beam [But then what's left of me?]
https://replay.pokemonshowdown.com/gen7ou-728278926
https://replay.pokemonshowdown.com/gen7ou-728303379
Espeon Electric Seed [Hate you to the Sun and back]
https://replay.pokemonshowdown.com/gen7ou-728300854
https://replay.pokemonshowdown.com/gen7ou-728299933
https://replay.pokemonshowdown.com/gen7ou-728292872
https://replay.pokemonshowdown.com/gen7ou-728290964
https://replay.pokemonshowdown.com/gen7ou-728287246
https://replay.pokemonshowdown.com/gen7ou-728295844
Quagsire Curse/Amnesia [I can't never turn my back on you, Ditto's there xD]
https://replay.pokemonshowdown.com/gen7ou-728296458
https://replay.pokemonshowdown.com/gen7ou-728307516


1234567891011121314151617181920212223242526272
Hi Smogon!
First off, I apologize for all of the suffering I've been causing on the ladder by introducing Setup Boosting-based fat teams. I understand that this strategy is aggravating to face and only worsens the match-up issue we already deal with on a regular basis. That being said, I'm honestly surprised that there have been a few dominating forces on the Setup Boosting spectrum with looming eyes in the darkness, waiting for a decided player who believes in what they are capable to bring to the table and not disregard them just for how complicated it seems to handle them in hard-fought battles. For what they're worth, Setup Boosting pokemons have always been one of my favorite pokemons and their unique types/stats/abilities have always been intriguing to me.
The Team
This team fares pretty well against all kinds of teams ranging from full stall to cancer rain teams to hyper offense, while being particularly effective against both TR offense and Balanced teams without Dark types. Like any team it has a fair share of weaknesses and most likely has room for improvement, so rates and feedback are always appreciated. Even with the team's shortcomings, I've managed to stay on high ladder for a chunk of time and get many accounts to 1900's. I'd even go far enough to say that the combination of Tapu Koko Screens, Espeon Electric Seed, Necrosma Rest, Clefable Stored Power + Charge Beam, Mega Charizard X Belly Drum and Quagsire Waterium Z is borderline broken, but that's a discussion for another time.
Team Building Process
The idea of creating a foundation for a team using Setup Boosting didn't come spontaneously. There is this very good friend named Aurella. I remember that by that time I was running a lame Sun team when I got to face Aurella. She was using a team that ultimately became what today's called Bummo. The team went like this:


A few weeks after that I reached out to her and told her that I believe in Setup Boosting being the next big thing in the OU tier. She agreed and inmediately we began testing the team from above to see how it went. It turned out not to be very effective for the following reasons:
1. Mega Venusaur was kind of passive for what the mega slot was demanding.
2. The Clefable set she was running by that time was a Stored Power/Flamethrower which isn't as effective as the Charge Beam set.
3. Reiniclus was running a Kee berry which was very luck dependant considering you had to wait for a physical move to hit you.
4. The Lele set: Psyshock/Draining Kiss/Calm Mind/Iron Defense was as amazing as it is awful.
However, not everything was wrong about this team. Both Ninetails-alola as Quagsire were putting some work. The inspiration for the Quagsire Waterium Z I run on this team came out from Aurella's Quagsire. The only difference is that mines runs Aqua Tail and hers was running Waterfall by that time.


In the wake of all this, we went back to the drawing board and I informed Aurella that the Clefable set must be changed to the Stored Power/Charge Beam set for good as it performs much more efficiently.
Also, I introduced to Aurella this fire Necrosma's set: Necrosma Iron head/Calm Mind/Rest/ Stored power set, and suggested to replace Reuniclus for it.


As the time was passing by we soon came to realization that we should a thrid Stored power user. So after further research I introduced Aurella Sigilyph Stored Power/Charge Beam/Roost/Cosmic Power.


At this point, we weren't pleased by Ninetails as our screen setter, so I employed Tapu Koko.


With this acquisition, Electric Terrain was crippling Sigilyph and so that I was forced to replace Sigilyph for a much better but forsaken Stored Power user: Espeon. At first I thought that Kee Berry was cool on Espeon, but after multiple battles I discovered Electric seed + Electric terrain was better on so many levels.


Next, just when I thought I had it all, I was trying to look for a pokemon that can bring offensive presence to cripple Toxapex Haze and Amoongus Clear Smog. Reason being is that I added Mega Pinsir.


Unfortunately, the team did go high ladder but just not enough and eventually dropped from 1900's to 1600's. So I came to a realization that something is not right about this team. Reason of why I added Mega Sableye CM.


Here is when things get scary, because it was becoming obvious that Mega Gyarados Taunt, Toxapex Haze and Amoongus Clear Smog
were detering my team. For instance, I was reminiscing a Mega Charizard X Set I used to run in the beginning of Kommo-o Belly Drum, so I thought it would an amazing idea to incorporate it on the team, plus I knew how well it performs behind screens.


A few weeks after that I reached out to her and told her that I believe in Setup Boosting being the next big thing in the OU tier. She agreed and inmediately we began testing the team from above to see how it went. It turned out not to be very effective for the following reasons:
1. Mega Venusaur was kind of passive for what the mega slot was demanding.
2. The Clefable set she was running by that time was a Stored Power/Flamethrower which isn't as effective as the Charge Beam set.
3. Reiniclus was running a Kee berry which was very luck dependant considering you had to wait for a physical move to hit you.
4. The Lele set: Psyshock/Draining Kiss/Calm Mind/Iron Defense was as amazing as it is awful.
However, not everything was wrong about this team. Both Ninetails-alola as Quagsire were putting some work. The inspiration for the Quagsire Waterium Z I run on this team came out from Aurella's Quagsire. The only difference is that mines runs Aqua Tail and hers was running Waterfall by that time.
In the wake of all this, we went back to the drawing board and I informed Aurella that the Clefable set must be changed to the Stored Power/Charge Beam set for good as it performs much more efficiently.
Also, I introduced to Aurella this fire Necrosma's set: Necrosma Iron head/Calm Mind/Rest/ Stored power set, and suggested to replace Reuniclus for it.
As the time was passing by we soon came to realization that we should a thrid Stored power user. So after further research I introduced Aurella Sigilyph Stored Power/Charge Beam/Roost/Cosmic Power.
At this point, we weren't pleased by Ninetails as our screen setter, so I employed Tapu Koko.
With this acquisition, Electric Terrain was crippling Sigilyph and so that I was forced to replace Sigilyph for a much better but forsaken Stored Power user: Espeon. At first I thought that Kee Berry was cool on Espeon, but after multiple battles I discovered Electric seed + Electric terrain was better on so many levels.
Next, just when I thought I had it all, I was trying to look for a pokemon that can bring offensive presence to cripple Toxapex Haze and Amoongus Clear Smog. Reason being is that I added Mega Pinsir.
Unfortunately, the team did go high ladder but just not enough and eventually dropped from 1900's to 1600's. So I came to a realization that something is not right about this team. Reason of why I added Mega Sableye CM.
Here is when things get scary, because it was becoming obvious that Mega Gyarados Taunt, Toxapex Haze and Amoongus Clear Smog
were detering my team. For instance, I was reminiscing a Mega Charizard X Set I used to run in the beginning of Kommo-o Belly Drum, so I thought it would an amazing idea to incorporate it on the team, plus I knew how well it performs behind screens.
-------------------------
Team Breakdown
-------------------------
Mega Charizard X
Item: Charizardite X
Ability: Tough Claws
EVs: 252 Atk / 4 Def / 252 Spe
Nature: Jolly (+Spe, -SpA)
• Flame Charge
• Roost
• Belly Drum
• Dragon Claw
This Hyper Offensive pokemon metaphorically signals the End of Days; the rest of the team takes advantage evenly from its capabilities. Its ability Tough Claws and high attack makes it a strong wallbreaker, but taking into consideration that it gets outsped by commonly used Choice Scarf users such as Greninja, Keldeo, and Garchomp, as well as many offensive Pokemon before getting the +1 Spe boost from Flame Charge, only makes you wanna wonder if it's worth the mega slot.
Roost - Improves Charizard's longevity, eases setup, and allows it to stay out of range of revenge killers.
Flame Charge - You will often choose to set up Flame Charge depending on the makeup of your opponent's team. Flame Charge works best against offensive and slower, bulkier teams without Unaware users.
Dragon Claw - Reliable secondary STAB move that hits most Pokemon that resist Fire for solid damage and has the benefit of not making Mega Charizard X suffer recoil damage, unlike Flare Blitz. While situational,
Belly Drum - While situational, maximizes Mega Charizard X's Attack stat by raising it to +6 stages, that combined with the +1 stage gained from Flame Charge, the supportive Reflect and Light Screen screens, Dragon Claw as a safe option to use against Water-types and Roost to increase survivability and extend your sweep, can only make a legitimate argument about it being paired with screens is what's next.
EV Spread - Maximum Attack investment is used to hit as hard as possible, and a Jolly nature is used to outspeed Jolly Choice Scarf Landorus-T, Jolly Choice Scarf Excadrill, Choice Scarf Tapu Lele, and Modest Choice Scarf Keldeo. This spread also allows Mega Charizard X to outspeed neutral-natured base 100 Pokemon such as Mega Gardevoir and Mega Medicham as well as most Kyurem-B before a Dragon Dance.
Resistance
-----------------------------------------------------------------------------------------------------------------------------------------------------------------------
252 SpA Choice Specs Tapu Lele Moonblast vs. 0 HP / 4 SpD Charizard-Mega-X through Light Screen: 132-156 (44.4 - 52.5%) -- 23.8% chance to 2HKO
-----------------------------------------------------------------------------------------------------------------------------------------------------------------------
252 SpA Choice Specs Greninja-Ash Dark Pulse vs. 0 HP / 4 SpD Charizard-Mega-X through Light Screen: 126-149 (42.4 - 50.1%) -- 0.4% chance to 2HKO
-----------------------------------------------------------------------------------------------------------------------------------------------------------------------
0 SpA Tapu Fini Moonblast vs. 0 HP / 4 SpD Charizard-Mega-X through Light Screen: 56-66 (18.8 - 22.2%) -- possible 5HKO
-----------------------------------------------------------------------------------------------------------------------------------------------------------------------
0 Atk Landorus-Therian Earthquake vs. 0 HP / 0 Def Charizard-Mega-X through Reflect: 136-162 (45.7 - 54.5%) -- 53.9% chance to 2HKO
-----------------------------------------------------------------------------------------------------------------------------------------------------------------------
4 SpA Heatran Earth Power vs. 0 HP / 4 SpD Charizard-Mega-X through Light Screen: 93-110 (31.3 - 37%) -- 78.5% chance to 3HKO
-----------------------------------------------------------------------------------------------------------------------------------------------------------------------
Offensive Prowess
-----------------------------------------------------------------------------------------------------------------------------------------------------------------------
+6 252 Atk Tough Claws Charizard-Mega-X Dragon Claw vs. 248 HP / 8 Def Toxapex: 468-552 (154.4 - 182.1%) -- guaranteed OHKO
-----------------------------------------------------------------------------------------------------------------------------------------------------------------------
+5 252 Atk Tough Claws Charizard-Mega-X Flame Charge vs. 252 HP / 240+ Def Landorus-Therian: 289-342 (75.6 - 89.5%) -- guaranteed 2HKO after Leftovers recovery
-----------------------------------------------------------------------------------------------------------------------------------------------------------------------
+6 252 Atk Tough Claws Charizard-Mega-X Flame Charge vs. 248 HP / 8 Def Tapu Fini: 186-220 (54.2 - 64.1%) -- guaranteed 2HKO after Leftovers recovery
-----------------------------------------------------------------------------------------------------------------------------------------------------------------------
+6 252 Atk Tough Claws Charizard-Mega-X Dragon Claw vs. 252 HP / 0 Def Heatran: 322-380 (83.4 - 98.4%) -- guaranteed 2HKO after Leftovers recovery
-----------------------------------------------------------------------------------------------------------------------------------------------------------------------
+6 252 Atk Tough Claws Charizard-Mega-X Flame Charge vs. +1 152 HP / 0 Def Hawlucha: 360-424 (107.4 - 126.5%) -- guaranteed OHKO
-----------------------------------------------------------------------------------------------------------------------------------------------------------------------
+6 252 Atk Tough Claws Charizard-Mega-X Flame Charge vs. 0 HP / 4 Def Greninja: 293-345 (102.8 - 121%) -- guaranteed OHKO
-----------------------------------------------------------------------------------------------------------------------------------------------------------------------
-----------------------------------------------------------------------------------------------------------------------------------------------------------------------
252 SpA Choice Specs Tapu Lele Moonblast vs. 0 HP / 4 SpD Charizard-Mega-X through Light Screen: 132-156 (44.4 - 52.5%) -- 23.8% chance to 2HKO
-----------------------------------------------------------------------------------------------------------------------------------------------------------------------
252 SpA Choice Specs Greninja-Ash Dark Pulse vs. 0 HP / 4 SpD Charizard-Mega-X through Light Screen: 126-149 (42.4 - 50.1%) -- 0.4% chance to 2HKO
-----------------------------------------------------------------------------------------------------------------------------------------------------------------------
0 SpA Tapu Fini Moonblast vs. 0 HP / 4 SpD Charizard-Mega-X through Light Screen: 56-66 (18.8 - 22.2%) -- possible 5HKO
-----------------------------------------------------------------------------------------------------------------------------------------------------------------------
0 Atk Landorus-Therian Earthquake vs. 0 HP / 0 Def Charizard-Mega-X through Reflect: 136-162 (45.7 - 54.5%) -- 53.9% chance to 2HKO
-----------------------------------------------------------------------------------------------------------------------------------------------------------------------
4 SpA Heatran Earth Power vs. 0 HP / 4 SpD Charizard-Mega-X through Light Screen: 93-110 (31.3 - 37%) -- 78.5% chance to 3HKO
-----------------------------------------------------------------------------------------------------------------------------------------------------------------------
Offensive Prowess
-----------------------------------------------------------------------------------------------------------------------------------------------------------------------
+6 252 Atk Tough Claws Charizard-Mega-X Dragon Claw vs. 248 HP / 8 Def Toxapex: 468-552 (154.4 - 182.1%) -- guaranteed OHKO
-----------------------------------------------------------------------------------------------------------------------------------------------------------------------
+5 252 Atk Tough Claws Charizard-Mega-X Flame Charge vs. 252 HP / 240+ Def Landorus-Therian: 289-342 (75.6 - 89.5%) -- guaranteed 2HKO after Leftovers recovery
-----------------------------------------------------------------------------------------------------------------------------------------------------------------------
+6 252 Atk Tough Claws Charizard-Mega-X Flame Charge vs. 248 HP / 8 Def Tapu Fini: 186-220 (54.2 - 64.1%) -- guaranteed 2HKO after Leftovers recovery
-----------------------------------------------------------------------------------------------------------------------------------------------------------------------
+6 252 Atk Tough Claws Charizard-Mega-X Dragon Claw vs. 252 HP / 0 Def Heatran: 322-380 (83.4 - 98.4%) -- guaranteed 2HKO after Leftovers recovery
-----------------------------------------------------------------------------------------------------------------------------------------------------------------------
+6 252 Atk Tough Claws Charizard-Mega-X Flame Charge vs. +1 152 HP / 0 Def Hawlucha: 360-424 (107.4 - 126.5%) -- guaranteed OHKO
-----------------------------------------------------------------------------------------------------------------------------------------------------------------------
+6 252 Atk Tough Claws Charizard-Mega-X Flame Charge vs. 0 HP / 4 Def Greninja: 293-345 (102.8 - 121%) -- guaranteed OHKO
-----------------------------------------------------------------------------------------------------------------------------------------------------------------------
Tapu Koko
Item: Light Clay
Ability: Electric Surge
EVs: 252 HP / 4 Def / 252 Spe
Nature: Timid (+Spe, -Atk)
• Reflect
• Light Screen
• Taunt
• Defog
Tapu Koko's purpose on this team is to provide the team with the defensive boost they need by setting up screens and patch up the team's weaknesses to Toxic Spikes, Roar/Whirlwind users and Taunt/Encore users since it runs Taunt and Defog. Its swiftness to set up screens, hazard removal, and prevent opposing Taunt/Encore users from crippling the sweepers, makes it a go-to facilatate stuff for the Setup Boosting pokemons on the shelf.
Quagsire
Item: Waterium Z
Ability: Unaware
EVs: 252 HP / 252 Def / 4 SpD
Nature: Relaxed (+Def, -Spe)
• Aqua Tail
• Recover
• Curse
• Amnesia
Quagsire is my most important line of defense against potent special wallbreakers including Zard Y and LO Tornadus-T. The utility it provides between Boosting moves and Boosting negation in Unaware makes it an essential member of the team for shutting down opposing Setup Boosting pokemons, as well as picking off frail attackers like Weavile, Alakazam and Gengar when it's not fully boosted. Although Waterium Z may seem redundant unlike Leftovers, it gives Quagsire a way of punishing Mega Gyarados, Ash-Greninja, and almost anything else that would normally make Quagsire a dead weight. Increasing your Defensive stages at +6 on opposing offense teams makes them incredibly easy to wear down. This set notoriously cruel to opposing TR teams and teams without Grass type pokemons, usually turning the match-up in my favor.
Clefable
Item: Leftovers
Ability: Magic Guard
EVs: 252 HP / 172 Def / 84 SpD
Nature: Bold (+Def, -Atk)
• Stored Power
• Soft Boiled
• Cosmic Power
• Charge Beam
In terms of negating Taunt, this set of Clefable is an absolute necessity for Status condition and Recoil Damage control and keeping momentum in the presence of common Taunt setters like Tapu Fini, Greninja and Heatran. Considering the majority of Steel type pokemons with the exception of Magearna, Heatran and Magnezone are physical attackers, I figured a physically defensive spread would make Clefable's job as easy as possible. This set has to facilitate Boosting in the face of strong special attackers Taunt users, all while needing partners that can take on these powerful threats if Clefable is in distress. The Stored Power Clefable hype seems to have died down and people are beginning to realize how much of a nuisance Clefable is with Stored Power/Charge Beam.
Stored power - Gets stronger and stronger as Clefable obtains boosts, becoming incredibly powerful and eventually OHKOing most of the metagame.
Soft Boiled - Keeps Mega Latias healthy over the course of a match, allowing it to survive powerful hits like Landorus-T's Supersonic Skystrike and Mega Pinsir's Return.
Cosmic Power - Boosts Clefable's Special Attack and Special Defense by one stage each, preparing it for a sweep and making it near unbreakable after several boosts.
Charge Beam - Mostly used for strengthening Stored Power and neutral coverage to hit Steel- and Dark-types such as Greninja, Celesteela, and Jirachi while also hitting Pokemon such as Mega Pinsir, Mantine, and Tornadus-T harder initially.
EV Spread - Leftovers increases Clefable's longevity and allows it to check many Pokemon much better. The given Special Defense and HP investment along with a Calm nature allow Clefable to, most of the time, avoid the 2HKO from Mild Life Orb Kyurem-B's Ice Beam, Thundurus's Thunderbolt, Mega Diancie's Moonblast, and Mega Manectric's Thunderbolt. The given Defense and HP investment allow Clefable to avoid the 2HKO from Jolly Mega Lopunny's Return, Latios's Psyshock, and Jolly Mega Gyarados's Waterfall, as well as the OHKO from Choice Band Scizor's Bullet Punch.
Resistance
-----------------------------------------------------------------------------------------------------------------------------------------------------------------------
8 SpA Magearna Flash Cannon vs. +1 252 HP / 84 SpD Clefable through Light Screen: 73-87 (18.5 - 22%) -- possible 6HKO after Leftovers recovery
-----------------------------------------------------------------------------------------------------------------------------------------------------------------------
252 Atk Kartana Smart Strike vs. +1 252 HP / 172+ Def Clefable through Reflect: 94-112 (23.8 - 28.4%) -- possible 5HKO after Leftovers recovery
-----------------------------------------------------------------------------------------------------------------------------------------------------------------------
252+ Atk Bisharp Iron Head vs. +1 252 HP / 172+ Def Clefable through Reflect: 90-106 (22.8 - 26.9%) -- possible 5HKO after Leftovers recovery
-----------------------------------------------------------------------------------------------------------------------------------------------------------------------
0 Atk Jirachi Iron Head vs. +1 252 HP / 172+ Def Clefable through Reflect: 55-66 (13.9 - 16.7%) -- possible 9HKO after Leftovers recovery
-----------------------------------------------------------------------------------------------------------------------------------------------------------------------
252 Atk Life Orb Excadrill Iron Head vs. +1 252 HP / 172+ Def Clefable through Reflect: 113-134 (28.6 - 34%) -- 98.8% chance to 4HKO after Leftovers recovery
-----------------------------------------------------------------------------------------------------------------------------------------------------------------------
64+ Atk Technician Scizor-Mega Bullet Punch vs. +1 252 HP / 172+ Def Clefable through Reflect: 67-81 (17 - 20.5%) -- possible 7HKO after Leftovers recovery
-----------------------------------------------------------------------------------------------------------------------------------------------------------------------
-----------------------------------------------------------------------------------------------------------------------------------------------------------------------
8 SpA Magearna Flash Cannon vs. +1 252 HP / 84 SpD Clefable through Light Screen: 73-87 (18.5 - 22%) -- possible 6HKO after Leftovers recovery
-----------------------------------------------------------------------------------------------------------------------------------------------------------------------
252 Atk Kartana Smart Strike vs. +1 252 HP / 172+ Def Clefable through Reflect: 94-112 (23.8 - 28.4%) -- possible 5HKO after Leftovers recovery
-----------------------------------------------------------------------------------------------------------------------------------------------------------------------
252+ Atk Bisharp Iron Head vs. +1 252 HP / 172+ Def Clefable through Reflect: 90-106 (22.8 - 26.9%) -- possible 5HKO after Leftovers recovery
-----------------------------------------------------------------------------------------------------------------------------------------------------------------------
0 Atk Jirachi Iron Head vs. +1 252 HP / 172+ Def Clefable through Reflect: 55-66 (13.9 - 16.7%) -- possible 9HKO after Leftovers recovery
-----------------------------------------------------------------------------------------------------------------------------------------------------------------------
252 Atk Life Orb Excadrill Iron Head vs. +1 252 HP / 172+ Def Clefable through Reflect: 113-134 (28.6 - 34%) -- 98.8% chance to 4HKO after Leftovers recovery
-----------------------------------------------------------------------------------------------------------------------------------------------------------------------
64+ Atk Technician Scizor-Mega Bullet Punch vs. +1 252 HP / 172+ Def Clefable through Reflect: 67-81 (17 - 20.5%) -- possible 7HKO after Leftovers recovery
-----------------------------------------------------------------------------------------------------------------------------------------------------------------------
Espeon
Item: Electric Seed
Ability: Magic Bounce
EVs: 252 HP / 252 Def / 4 SpD
Nature: Bold (+Def, -Atk)
• Stored Power
• Morning Sun
• Calm Mind
• Dazzling Gleam
Espeon is my magic bouncer of choice, as it counters most common hazard setters such as: Heatran, Ferrothorn and Landorous-T. It seems that standard and common Heatran teams are fully prepared to deal with Espeon, whether by being paired with Ash-Greninja or running Firium Z. In the latter situation, Espeon has nothing to fear and becomes a Dazzling Gleam-spammer on Dark type pokemons. When I am forced to use Dazzling Gleam on Dark type pokemons, I can get the kill while leaving Espeon in distress so that the next member of the opposing team gets to reliably revenge kill Espeon, often clearing a path for Necrosma to do whatever it wants now that the opposing team doesn't include a Dark type pokemon. Espeon is also a reliable check to Magma Storm Heatran and plenty of other physical and special attackers Hippowdon and Magearna. Considering my team cannot simply plow through opposing stall, Magic Bounce support is an absolute necessity making it very difficult for the rest of the team to be worn down. Espeon in itself is actually a fairly decent stall-breaker with nothing more than an uninvested Stored Power.
Stored Power - Allows Espeon to OHKO Mega Pinsir after two boosts.
Morning Sun - Great move to recover any HP Espeon lost due to residual damage and allows it to stall out opposing special attackers.
Calm Mind - Boosting move of choice, as it allows Espeon to boost its Special Attack and Stored Power's strength simultaneously. It also has the nifty bonus of making Espeon more specially bulky, and if it is passed a few Defense boosts, it becomes extremely hard to take down.
Dazzling Gleam - Gives Espeon a way to check Tyranitar and hit every Dark-type in OU at least neutrally.
EV/IV Spread - The EV spread provides Espeon with as much physical bulk as possible, as it will have to switch into Pokemon like Hippowdon and Skarmory to avoid phazing moves.
Resistance
-----------------------------------------------------------------------------------------------------------------------------------------------------------------------
252 SpA Choice Specs Greninja-Ash Dark Pulse vs. +1 252 HP / 0 SpD Espeon through Light Screen: 154-183 (46.1 - 54.7%) -- 9.4% chance to 2HKO after Leftovers
recovery
-----------------------------------------------------------------------------------------------------------------------------------------------------------------------
252 Atk Aerilate Pinsir-Mega Return vs. +1 252 HP / 224+ Def Espeon: 154-183 (46.1 - 54.7%) -- 9.4% chance to 2HKO after Leftovers recovery
-----------------------------------------------------------------------------------------------------------------------------------------------------------------------
60+ Atk Tapu Bulu Wood Hammer vs. +1 252 HP / 224+ Def Espeon in Grassy Terrain: 190-225 (56.8 - 67.3%) -- guaranteed 2HKO after Leftovers recovery and Grassy Terrain recovery
-----------------------------------------------------------------------------------------------------------------------------------------------------------------------
252+ Atk Choice Band Zygarde Thousand Arrows vs. +1 252 HP / 224+ Def Espeon: 136-162 (40.7 - 48.5%) -- guaranteed 3HKO after Leftovers recovery
-----------------------------------------------------------------------------------------------------------------------------------------------------------------------
252+ Atk Life Orb Mimikyu Shadow Claw vs. +1 252 HP / 224+ Def Espeon: 174-205 (52 - 61.3%) -- 95.3% chance to 2HKO after Leftovers recovery
-----------------------------------------------------------------------------------------------------------------------------------------------------------------------
252 Atk Choice Band Weavile Knock Off vs. +1 252 HP / 224+ Def Espeon: 204-242 (61 - 72.4%) -- guaranteed 2HKO
-----------------------------------------------------------------------------------------------------------------------------------------------------------------------
Offensive prowess
-----------------------------------------------------------------------------------------------------------------------------------------------------------------------
+2 0 SpA Espeon Stored Power (120 BP) vs. 0 HP / 0 SpD Pinsir-Mega: 354-417 (130.6 - 153.8%) -- guaranteed OHKO
-----------------------------------------------------------------------------------------------------------------------------------------------------------------------
+2 0 SpA Espeon Stored Power (120 BP) vs. 160 HP / 28 SpD Zygarde: 328-387 (82.6 - 97.4%) -- guaranteed 2HKO
-----------------------------------------------------------------------------------------------------------------------------------------------------------------------
+2 0 SpA Espeon Stored Power (120 BP) vs. 252 HP / 0 SpD Landorus-Therian: 390-459 (102 - 120.1%) -- guaranteed OHKO
-----------------------------------------------------------------------------------------------------------------------------------------------------------------------
+2 0 SpA Espeon Stored Power (120 BP) vs. 0 HP / 0 SpD Tapu Bulu: 339-399 (120.6 - 141.9%) -- guaranteed OHKO
-----------------------------------------------------------------------------------------------------------------------------------------------------------------------
+2 0 SpA Espeon Stored Power (120 BP) vs. 248 HP / 0 SpD Tapu Fini: 258-304 (75.2 - 88.6%) -- guaranteed 2HKO after Leftovers recovery
-----------------------------------------------------------------------------------------------------------------------------------------------------------------------
+2 0 SpA Espeon Stored Power (120 BP) vs. 252 HP / 112 SpD Hippowdon: 366-432 (87.1 - 102.8%) -- 18.8% chance to OHKO after Leftovers recovery
-----------------------------------------------------------------------------------------------------------------------------------------------------------------------
+1 0 SpA Espeon Dazzling Gleam vs. 80 HP / 0 SpD Tyranitar in Sand: 146-172 (40.4 - 47.6%) -- guaranteed 3HKO
-----------------------------------------------------------------------------------------------------------------------------------------------------------------------
+1 0 SpA Espeon Dazzling Gleam vs. 0 HP / 4 SpD Weavile: 248-292 (88.2 - 103.9%) -- 25% chance to OHKO
-----------------------------------------------------------------------------------------------------------------------------------------------------------------------
+1 0 SpA Espeon Dazzling Gleam vs. 0 HP / 0 SpD Greninja: 286-338 (100.3 - 118.5%) -- guaranteed OHKO
-----------------------------------------------------------------------------------------------------------------------------------------------------------------------
+1 0 SpA Espeon Dazzling Gleam vs. 0 HP / 4 SpD Hoopa-Unbound: 172-204 (57.1 - 67.7%) -- guaranteed 2HKO
-----------------------------------------------------------------------------------------------------------------------------------------------------------------------
-----------------------------------------------------------------------------------------------------------------------------------------------------------------------
252 SpA Choice Specs Greninja-Ash Dark Pulse vs. +1 252 HP / 0 SpD Espeon through Light Screen: 154-183 (46.1 - 54.7%) -- 9.4% chance to 2HKO after Leftovers
recovery
-----------------------------------------------------------------------------------------------------------------------------------------------------------------------
252 Atk Aerilate Pinsir-Mega Return vs. +1 252 HP / 224+ Def Espeon: 154-183 (46.1 - 54.7%) -- 9.4% chance to 2HKO after Leftovers recovery
-----------------------------------------------------------------------------------------------------------------------------------------------------------------------
60+ Atk Tapu Bulu Wood Hammer vs. +1 252 HP / 224+ Def Espeon in Grassy Terrain: 190-225 (56.8 - 67.3%) -- guaranteed 2HKO after Leftovers recovery and Grassy Terrain recovery
-----------------------------------------------------------------------------------------------------------------------------------------------------------------------
252+ Atk Choice Band Zygarde Thousand Arrows vs. +1 252 HP / 224+ Def Espeon: 136-162 (40.7 - 48.5%) -- guaranteed 3HKO after Leftovers recovery
-----------------------------------------------------------------------------------------------------------------------------------------------------------------------
252+ Atk Life Orb Mimikyu Shadow Claw vs. +1 252 HP / 224+ Def Espeon: 174-205 (52 - 61.3%) -- 95.3% chance to 2HKO after Leftovers recovery
-----------------------------------------------------------------------------------------------------------------------------------------------------------------------
252 Atk Choice Band Weavile Knock Off vs. +1 252 HP / 224+ Def Espeon: 204-242 (61 - 72.4%) -- guaranteed 2HKO
-----------------------------------------------------------------------------------------------------------------------------------------------------------------------
Offensive prowess
-----------------------------------------------------------------------------------------------------------------------------------------------------------------------
+2 0 SpA Espeon Stored Power (120 BP) vs. 0 HP / 0 SpD Pinsir-Mega: 354-417 (130.6 - 153.8%) -- guaranteed OHKO
-----------------------------------------------------------------------------------------------------------------------------------------------------------------------
+2 0 SpA Espeon Stored Power (120 BP) vs. 160 HP / 28 SpD Zygarde: 328-387 (82.6 - 97.4%) -- guaranteed 2HKO
-----------------------------------------------------------------------------------------------------------------------------------------------------------------------
+2 0 SpA Espeon Stored Power (120 BP) vs. 252 HP / 0 SpD Landorus-Therian: 390-459 (102 - 120.1%) -- guaranteed OHKO
-----------------------------------------------------------------------------------------------------------------------------------------------------------------------
+2 0 SpA Espeon Stored Power (120 BP) vs. 0 HP / 0 SpD Tapu Bulu: 339-399 (120.6 - 141.9%) -- guaranteed OHKO
-----------------------------------------------------------------------------------------------------------------------------------------------------------------------
+2 0 SpA Espeon Stored Power (120 BP) vs. 248 HP / 0 SpD Tapu Fini: 258-304 (75.2 - 88.6%) -- guaranteed 2HKO after Leftovers recovery
-----------------------------------------------------------------------------------------------------------------------------------------------------------------------
+2 0 SpA Espeon Stored Power (120 BP) vs. 252 HP / 112 SpD Hippowdon: 366-432 (87.1 - 102.8%) -- 18.8% chance to OHKO after Leftovers recovery
-----------------------------------------------------------------------------------------------------------------------------------------------------------------------
+1 0 SpA Espeon Dazzling Gleam vs. 80 HP / 0 SpD Tyranitar in Sand: 146-172 (40.4 - 47.6%) -- guaranteed 3HKO
-----------------------------------------------------------------------------------------------------------------------------------------------------------------------
+1 0 SpA Espeon Dazzling Gleam vs. 0 HP / 4 SpD Weavile: 248-292 (88.2 - 103.9%) -- 25% chance to OHKO
-----------------------------------------------------------------------------------------------------------------------------------------------------------------------
+1 0 SpA Espeon Dazzling Gleam vs. 0 HP / 0 SpD Greninja: 286-338 (100.3 - 118.5%) -- guaranteed OHKO
-----------------------------------------------------------------------------------------------------------------------------------------------------------------------
+1 0 SpA Espeon Dazzling Gleam vs. 0 HP / 4 SpD Hoopa-Unbound: 172-204 (57.1 - 67.7%) -- guaranteed 2HKO
-----------------------------------------------------------------------------------------------------------------------------------------------------------------------
Necrozma
Item: Chesto Berry
Ability: Prism Armor
EVs: 252 HP / 64 Def / 192 SpD
Nature: Calm (+SpD, -Atk)
• Stored Power
• Iron Defense
• Rest
• Calm Mind
Although the team is primarily built around Setup Boosting, the rest of the team benefits equally from Necrozma's stats and ability. For example, common threats like standard Excadrill Hazard Setter, Greninja Sash Lead, Mega "unresisted stab" Pinsir, Latias CM and Gengar LO would otherwise be difficult to wall. Other common threats such as Mega Mawile and Mega Alakazam have to choose between Dark/Ghost coverage and/or setup moves which means that my team would be able to handle any given set. I chose Chesto Berry/Rest over Leftovers/Moonlight, and I believe the latter option is too situational considering the structure and weaknesses of the team. The most common terrain setter at the moment is Tapu Koko, who also happens to be one of the best Taunt users in the tier, thus mitigating Necrozma's ability to deal with Tapu Koko regardless. Tapu Koko and its ability Electric Terrain, however, is really the only prevalent downside to running Chesto Berry, though seeing Tapu Koko on the opposing team doesn't necessarily make Necrozma useless. More often than not, Chesto Berry allows me a free turn to have Necrozma reinvent itself. Furthermore, Chesto Berry ensures that my HP are back to 100 which eases up setup boosting.
Stored Power - Stored Power is Necrozma's sole attacking move, allowing it to hit harder with every stat boost from Calm Mind.
Iron Defense - Forgoes coverage in order to boost Necrozma's Defense, making it nearly impossible for boosting physical attackers to break through it, particularly Swords Dance Bisharp and Dragon Dance Mega Charizard X.
Rest - Rest gives Necrozma a form of instant recovery that not only heals it to full HP but also removes any status conditions.
Calm Mind - Lets Necrozma hit harder and set up freely versus opposing special attackers.
EV/IV Spread - 252 HP EVs and 192 Special Defense EVs, in conjunction with a Calm nature, maximizes Necrozma's special walling prowess. While this may seem like a futile attempt at making Necrozma as bulky as Chansey, it actually allows Necrozma to handily wall various special threats, such as Life Orb Gengar and Greninja, and eventually defeat them.
252 SpA Choice Specs Greninja-Ash Dark Pulse vs. +1 252 HP / 192+ SpD Prism Armor Necrozma through Light Screen: 91-108 (22.8 - 27.1%) -- 48% chance to 4HKO
-----------------------------------------------------------------------------------------------------------------------------------------------------------------------
252 SpA Choice Specs Gengar Shadow Ball vs. +1 252 HP / 192+ SpD Prism Armor Necrozma through Light Screen: 81-95 (20.3 - 23.8%) -- guaranteed 5HKO
-----------------------------------------------------------------------------------------------------------------------------------------------------------------------
252+ SpA Choice Specs Kingdra Hydro Pump vs. +1 252 HP / 192+ SpD Necrozma in Rain through Light Screen: 97-115 (24.3 - 28.8%) -- 99.6% chance to 4HKO
-----------------------------------------------------------------------------------------------------------------------------------------------------------------------
252+ Atk Choice Band Tapu Bulu Wood Hammer vs. +2 252 HP / 64 Def Necrozma in Grassy Terrain through Reflect: 113-133 (28.3 - 33.4%) -- 95.9% chance to 4HKO after Grassy Terrain recovery
-----------------------------------------------------------------------------------------------------------------------------------------------------------------------
+2 252 Atk Kartana Leaf Blade vs. 252 HP / 64 Def Necrozma through Reflect: 175-207 (43.9 - 52%) -- 14.1% chance to 2HKO
-----------------------------------------------------------------------------------------------------------------------------------------------------------------------
+2 252+ Atk Life Orb Mimikyu Shadow Claw vs. 252 HP / 64 Def Prism Armor Necrozma through Reflect: 176-209 (44.2 - 52.5%) -- 19.9% chance to 2HKO
-----------------------------------------------------------------------------------------------------------------------------------------------------------------------
-----------------------------------------------------------------------------------------------------------------------------------------------------------------------
252 SpA Choice Specs Gengar Shadow Ball vs. +1 252 HP / 192+ SpD Prism Armor Necrozma through Light Screen: 81-95 (20.3 - 23.8%) -- guaranteed 5HKO
-----------------------------------------------------------------------------------------------------------------------------------------------------------------------
252+ SpA Choice Specs Kingdra Hydro Pump vs. +1 252 HP / 192+ SpD Necrozma in Rain through Light Screen: 97-115 (24.3 - 28.8%) -- 99.6% chance to 4HKO
-----------------------------------------------------------------------------------------------------------------------------------------------------------------------
252+ Atk Choice Band Tapu Bulu Wood Hammer vs. +2 252 HP / 64 Def Necrozma in Grassy Terrain through Reflect: 113-133 (28.3 - 33.4%) -- 95.9% chance to 4HKO after Grassy Terrain recovery
-----------------------------------------------------------------------------------------------------------------------------------------------------------------------
+2 252 Atk Kartana Leaf Blade vs. 252 HP / 64 Def Necrozma through Reflect: 175-207 (43.9 - 52%) -- 14.1% chance to 2HKO
-----------------------------------------------------------------------------------------------------------------------------------------------------------------------
+2 252+ Atk Life Orb Mimikyu Shadow Claw vs. 252 HP / 64 Def Prism Armor Necrozma through Reflect: 176-209 (44.2 - 52.5%) -- 19.9% chance to 2HKO
-----------------------------------------------------------------------------------------------------------------------------------------------------------------------
-------------------------
Threats
-------------------------
Ash-Greninja
I normally don't allow Greninja to transform into Ash-Greninja, but if by any chance it does, make sure to gamble pretty well the Screen/Setup Boosting gimmick. Most of the times, Ash-Greninja will be choice-locked into Dark Pulse, which clefable can certainly take advantage of and set up boosting . Quagsire can handle Ash-Greninja when already augmented by +2 stages os special defense. Espeon can also handle it behind screens by using dazzling gleam. Charizard X can also dispatch Ash-Greninja if it has its Spe stage augmented. All in all, Clefable is the one to be sent out to make front to Ash-Greninja.
Sword Dance Kartana
I highly recommend to keep Necrozma on the shelf because it can potentially cripple Kartana and disrupt its augmented attack by using Iron Defense. If Kartana is being coupled with a Grassy Terrain Tapu Bulu, your best asnwer is to set up screens beforehand, this way you can set up Iron Defense as well as your Stored power benefits from the boost and so that you can wear down kartana due to its lackluster Special Defense.
Taunt Mega Gyarados
In this case, it is suggested that you manage to make as much damage as you can to shorten Mega Gyarados's HP, so that you cripple Mega Gyarados with moves like Charge Beam from Clefable, Dragon Claw from Mega Charizard X. Once all of that has passed, in a 1v1 match the pokemon to switch in to is Quagsire, as its 252 HP / 252 Def investment and its Boosting move Curse would allow it to wall Waterfall-spam so that Quagsire can pick off Mega Gyarados with ease using Waterium Z Hydrop Vortex. Espeon would be useless against Mega Gyarados as Mold breaker Taunt gives the opposing Mega Gyarados the jump on Espeon.
Muk-Alola
The way I handle Muk-Alola is I would normally send out Tapu Koko and try to set screens up. After that, the Mega Charizard X Belly Drum set would get the job done. Other way to finish Muk-Alola up is to take advantage and set up boosting on Clefable as Magic Guard negates Poison status condition.
Replays
Mega Charizard X Belly Drum Offensive prowess [XX Juggernaut]
https://replay.pokemonshowdown.com/gen7ou-728271630
https://replay.pokemonshowdown.com/gen7ou-728273644
https://replay.pokemonshowdown.com/gen7ou-728291812
https://replay.pokemonshowdown.com/gen7ou-728282433
Necrosma Chesto Berry Rest [A flight of fancy]
https://replay.pokemonshowdown.com/gen7ou-728277261
https://replay.pokemonshowdown.com/gen7ou-728277750
https://replay.pokemonshowdown.com/gen7ou-728284805
https://replay.pokemonshowdown.com/gen7ou-728304985
Clefable Stored power/Charge Beam [But then what's left of me?]
https://replay.pokemonshowdown.com/gen7ou-728278926
https://replay.pokemonshowdown.com/gen7ou-728303379
Espeon Electric Seed [Hate you to the Sun and back]
https://replay.pokemonshowdown.com/gen7ou-728300854
https://replay.pokemonshowdown.com/gen7ou-728299933
https://replay.pokemonshowdown.com/gen7ou-728292872
https://replay.pokemonshowdown.com/gen7ou-728290964
https://replay.pokemonshowdown.com/gen7ou-728287246
https://replay.pokemonshowdown.com/gen7ou-728295844
Quagsire Curse/Amnesia [I can't never turn my back on you, Ditto's there xD]
https://replay.pokemonshowdown.com/gen7ou-728296458
https://replay.pokemonshowdown.com/gen7ou-728307516
Charizard-Mega-X @ Charizardite X
Ability: Blaze
EVs: 252 Atk / 4 Def / 252 Spe
Jolly Nature
- Flame Charge
- Roost
- Belly Drum
- Dragon Claw
Tapu Koko @ Light Clay
Ability: Electric Surge
Happiness: 0
EVs: 252 HP / 4 Def / 252 Spe
Timid Nature
IVs: 0 Atk
- Reflect
- Light Screen
- Taunt
- Defog
Quagsire @ Waterium Z
Ability: Unaware
EVs: 252 HP / 252 Def / 4 SpD
Impish Nature
- Aqua Tail
- Recover
- Curse
- Amnesia
Clefable @ Leftovers
Ability: Magic Guard
EVs: 252 HP / 172 Def / 84 SpD
Bold Nature
IVs: 0 Atk
- Stored Power
- Soft-Boiled
- Cosmic Power
- Charge Beam
HateU2TheMoon&Back (Espeon) (F) @ Electric Seed
Ability: Magic Bounce
Shiny: Yes
EVs: 252 HP / 252 Def / 4 SpD
Bold Nature
IVs: 0 Atk
- Stored Power
- Morning Sun
- Calm Mind
- Dazzling Gleam
Necrozma @ Chesto Berry
Ability: Prism Armor
EVs: 252 HP / 64 Def / 192 SpD
Calm Nature
IVs: 0 Atk
- Stored Power
- Rest
- Iron Defense
- Calm Mind
Aurella
Essence
DianaZaldivar
CamilaCruz
Storm Zone
manols
Crime♡
AnnaKartana
dia_sre
Fantastic_fuego
ilosetostalloroffense
Idud
nintendonoah
ZombieFriedChicken
Predator 30
Dark Elegy
hkjjljih
Austin Whitaker
StayHighAllTheTime
Essence
DianaZaldivar
CamilaCruz
Storm Zone
manols
Crime♡
AnnaKartana
dia_sre
Fantastic_fuego
ilosetostalloroffense
Idud
nintendonoah
ZombieFriedChicken
Predator 30
Dark Elegy
hkjjljih
Austin Whitaker
StayHighAllTheTime
BUMMO is an expression that 100% defines what a Hazardless Setup Boosting team stands for. Exuberantly disgusting to the naked eye, this team does not leave a good taste in the mouth, either giving the jump on this team or just straight up losing. It's head scratching not to get a crit on this boosted pokemons, but I always emphasize players that it's now 1/24 for a crit to occur, being 1/16 in past times. This team is intended to spread fun, but that intent is seemingly taking another direction. I've seen players running this setup boosting team, and one of them confessed me that it felt nauseating beating someone this manner. Someone even told me that this is a team for try-hards, and it was minutes later that I realize that that very same player, not only it kept on joing my battles, but also it was critiquing me out of distaste. More players started labelling this as something you will only see once a month, that adjustments are not needed to be made because facing this team is just as same as facing a Magikarp, it just takes you nowhere. Then after that I was thinking to myself that those players might be running Taunt/Encore/Trick/Dark type pokemons in the upcoming weeks. Furthermore, it's good to know I've always loved the termination ending in "UMMO", reason being is that I added a "B" in the commencement, to represent in the coolest way possible the "B" as in Boosting everywhere it is being used, because I consider Boosting to be a very prevalent playstyle that only needs a little more legitimacy from the players.
Kyurem Stall


Druddigon BP


Kommo-o Belly Drum HO


Double Blob Hyper Stall


Skarmory (F) @ Rocky Helmet
Ability: Sturdy
EVs: 252 HP / 252 Def / 4 SpD
Impish Nature
IVs: 0 Atk
- Whirlwind
- Roost
- Defog
- Spikes
Toxapex (F) @ Black Sludge
Ability: Regenerator
EVs: 252 HP / 194 Def / 62 SpD
Bold Nature
IVs: 0 Atk
- Scald
- Recover
- Toxic Spikes
- Haze
Clefable (F) @ Leftovers
Ability: Unaware
EVs: 252 HP / 252 Def / 4 SpD
Bold Nature
IVs: 0 Atk
- Moonblast
- Wish
- Protect
- Heal Bell
Sableye (M) @ Sablenite
Ability: Prankster
EVs: 252 HP / 252 Def / 4 SpD
Impish Nature
- Protect
- Recover
- Will-O-Wisp
- Knock Off
Chansey @ Eviolite
Ability: Natural Cure
EVs: 4 HP / 252 Def / 252 SpD
Impish Nature
IVs: 0 Atk
- Seismic Toss
- Soft-Boiled
- Toxic
- Stealth Rock
Kyurem @ Leftovers
Ability: Pressure
EVs: 252 HP / 124 Def / 132 SpD
Bold Nature
IVs: 0 Atk
- Ice Beam
- Roost
- Substitute
- Earth Power
Druddigon BP


Necrozma @ Weakness Policy
Ability: Prism Armor
EVs: 252 HP / 144 Def / 112 Spe
Bold Nature
IVs: 0 Atk
- Stored Power
- Moonlight
- Calm Mind
- Iron Defense
Scolipede (M) @ Black Sludge
Ability: Speed Boost
Shiny: Yes
EVs: 248 HP / 8 Def / 252 Spe
Jolly Nature
- Baton Pass
- Megahorn
- Protect
- Substitute
Manaphy @ Sitrus Berry
Ability: Hydration
EVs: 16 HP / 252 SpA / 240 Spe
Modest Nature
IVs: 0 Atk
- Surf
- Energy Ball
- Tail Glow
- Ice Beam
Espeon (F) @ Kee Berry
Ability: Magic Bounce
EVs: 252 HP / 224 Def / 32 Spe
Bold Nature
IVs: 0 Atk
- Stored Power
- Morning Sun
- Calm Mind
- Dazzling Gleam
Mawile @ Mawilite
Ability: Intimidate
EVs: 252 Atk / 4 Def / 252 Spe
Adamant Nature
- Play Rough
- Thunder Punch
- Swords Dance
- Fire Fang
Druddigon (M) @ Focus Sash
Ability: Mold Breaker
EVs: 252 HP / 4 Def / 252 Spe
Timid Nature
IVs: 19 Atk
- Taunt
- Glare
- Roar
- Stealth Rock
Kommo-o Belly Drum HO


Druddigon (M) @ Focus Sash
Ability: Mold Breaker
EVs: 252 HP / 4 Def / 252 Spe
Timid Nature
IVs: 19 Atk
- Taunt
- Glare
- Roar
- Stealth Rock
Bisharp @ Black Glasses
Ability: Defiant
EVs: 252 Atk / 4 Def / 252 Spe
Adamant Nature
- Knock Off
- Sucker Punch
- Swords Dance
- Substitute
Xurkitree @ Psychium Z
Ability: Beast Boost
EVs: 56 HP / 200 SpA / 252 Spe
Timid Nature
IVs: 0 Atk
- Thunderbolt
- Energy Ball
- Tail Glow
- Hypnosis
Pinsir @ Pinsirite
Ability: Hyper Cutter
Happiness: 0
EVs: 252 Atk / 4 Def / 252 Spe
Jolly Nature
- Frustration
- Earthquake
- Swords Dance
- Quick Attack
Ditto @ Choice Scarf
Ability: Imposter
EVs: 252 HP / 4 Atk / 252 Def
Relaxed Nature
IVs: 0 Spe
- Transform
Kommo-o @ Salac Berry
Ability: Bulletproof
EVs: 36 HP / 220 Atk / 252 Spe
Jolly Nature
- Drain Punch
- Thunder Punch
- Belly Drum
- Substitute
Double Blob Hyper Stall
Skarmory @ Shed Shell
Ability: Sturdy
EVs: 252 HP / 252 Def / 4 SpD
Impish Nature
IVs: 0 Atk
- Whirlwind
- Roost
- Defog
- Spikes
Quagsire @ Leftovers
Ability: Unaware
EVs: 252 HP / 252 Def / 4 SpD
Relaxed Nature
- Scald
- Recover
- Toxic
- Earthquake
Chansey @ Eviolite
Ability: Natural Cure
EVs: 4 HP / 252 Def / 252 SpD
Bold Nature
IVs: 0 Atk
- Seismic Toss
- Soft-Boiled
- Toxic
- Stealth Rock
Toxapex @ Black Sludge
Ability: Regenerator
EVs: 252 HP / 194 Def / 62 SpD
Bold Nature
IVs: 0 Atk
- Scald
- Recover
- Toxic Spikes
- Haze
Sableye-Mega @ Sablenite
Ability: Prankster
EVs: 252 HP / 252 Def / 4 SpD
Impish Nature
- Protect
- Recover
- Will-O-Wisp
- Knock Off
Blissey @ Leftovers
Ability: Natural Cure
EVs: 252 HP / 252 Def / 4 SpD
Bold Nature
IVs: 0 Atk
- Seismic Toss
- Soft-Boiled
- Wish
- Heal Bell
Proof of peak
Kommo-o (M) @ Salac Berry
Ability: Bulletproof
EVs: 36 HP / 220 Atk / 252 Spe
Jolly Nature
- Drain Punch
- Thunder Punch
- Belly Drum
- Substitute
Tapu Koko @ Light Clay
Ability: Electric Surge
Happiness: 0
EVs: 252 HP / 4 Def / 252 Spe
Timid Nature
- Reflect
- Light Screen
- Taunt
- U-turn
Clefable (F) @ Leftovers
Ability: Magic Guard
EVs: 252 HP / 172 Def / 84 SpD
Bold Nature
IVs: 0 Atk
- Stored Power
- Soft-Boiled
- Cosmic Power
- Charge Beam
Espeon (F) @ Electric Seed
Ability: Magic Bounce
EVs: 252 HP / 224 Def / 32 Spe
Bold Nature
IVs: 0 Atk
- Stored Power
- Morning Sun
- Calm Mind
- Dazzling Gleam
Ditto @ Choice Scarf
Ability: Imposter
EVs: 252 HP / 4 Atk / 252 Def
Relaxed Nature
IVs: 0 Spe
- Transform
Necrozma @ Chesto Berry
Ability: Prism Armor
EVs: 252 HP / 64 Def / 192 SpD
Calm Nature
IVs: 0 Atk
- Stored Power
- Rest
- Iron Defense
- Calm Mind
]
https://replay.pokemonshowdown.com/gen7ou-744153067
https://replay.pokemonshowdown.com/gen7ou-744065177
https://replay.pokemonshowdown.com/gen7ou-744061269
https://replay.pokemonshowdown.com/gen7ou-744039212
https://replay.pokemonshowdown.com/gen7ou-744033664
https://replay.pokemonshowdown.com/gen7ou-744015374
https://replay.pokemonshowdown.com/gen7ou-744065177
https://replay.pokemonshowdown.com/gen7ou-744061269
https://replay.pokemonshowdown.com/gen7ou-744039212
https://replay.pokemonshowdown.com/gen7ou-744033664
https://replay.pokemonshowdown.com/gen7ou-744015374
Druddigon (M) @ Focus Sash
Ability: Mold Breaker
EVs: 252 HP / 4 Def / 252 Spe
Timid Nature
IVs: 0 Atk
- Taunt
- Glare
- Roar
- Stealth Rock
Bisharp @ Life Orb
Ability: Defiant
EVs: 252 Atk / 4 Def / 252 Spe
Adamant Nature
- Knock Off
- Iron Head
- Swords Dance
- Sucker Punch
Tapu Koko @ Light Clay
Ability: Electric Surge
EVs: 252 HP / 4 Atk / 252 Spe
Jolly Nature
- Reflect
- Light Screen
- Taunt
- U-turn
Pinsir (M) @ Pinsirite
Ability: Hyper Cutter
Happiness: 0
EVs: 252 Atk / 4 Def / 252 Spe
Jolly Nature
- Frustration
- Earthquake
- Swords Dance
- Quick Attack
HateU2theMoon&Back (Espeon) (F) @ Electric Seed
Ability: Magic Bounce
EVs: 252 HP / 224 Def / 32 Spe
Bold Nature
IVs: 0 Atk
- Stored Power
- Morning Sun
- Calm Mind
- Dazzling Gleam
Xurkitree @ Psychium Z
Ability: Beast Boost
EVs: 4 Def / 252 SpA / 252 Spe
Timid Nature
IVs: 0 Atk
- Thunderbolt
- Energy Ball
- Tail Glow
- Hypnosis
Attachments
-
 594 bytes Views: 485
 -
 1.2 KB Views: 10,408
 -
 1.2 KB Views: 492
 -
 623 bytes Views: 516
 -
 1.1 KB Views: 455
 -
 1.1 KB Views: 389
 -
 1.1 KB Views: 465
 -
 1.1 KB Views: 469
 -
 1.1 KB Views: 491
 -
 1.1 KB Views: 493
 -
 6.5 KB Views: 402
 -
 86.5 KB Views: 503
 -
 12.1 KB Views: 473
 -
 213.5 KB Views: 468
 -
 213.5 KB Views: 10,808
 -
 302.1 KB Views: 10,120
 -
 13.4 KB Views: 1,803
 -
 13.4 KB Views: 1,588
 -
 86.5 KB Views: 511
 -
 119.1 KB Views: 512
 -
 119.6 KB Views: 503
 -
 594 bytes Views: 528
 -
 222.1 KB Views: 504
 -
 4.1 KB Views: 295
Last edited:


