|
PPRNG Guide - Receiving Perfect Wondercard Pokemon
Wondercard Pokemon are special Pokemon distributed by Nintendo. Most of them are unobtainable in the games otherwise, such as Keldeo and Genesect. Other times, the Pokemon carries an unobtainable move, for example the Crown Beasts from the previous generations or Deoxys with Nasty Plot. In most cases, these special Pokemon can be RNGed, but there are some differences from the standard seeds depicted before. Unlike seeds generated for capturing Pokemon, the IVs for Wondercard Pokemon are based on the PID frame. This actually makes things more streamlined as all you need to do is advance the PID frame to your target frame in order to receive a desired Pokemon. The downside is that searches may take a bit of time, particularly if your aim is to receive a shiny Pokemon from a Wondercard. Searching for a seedIn the main window of PPRNG, click on Wondercard Seed Searcher. Doing so opens the following window. 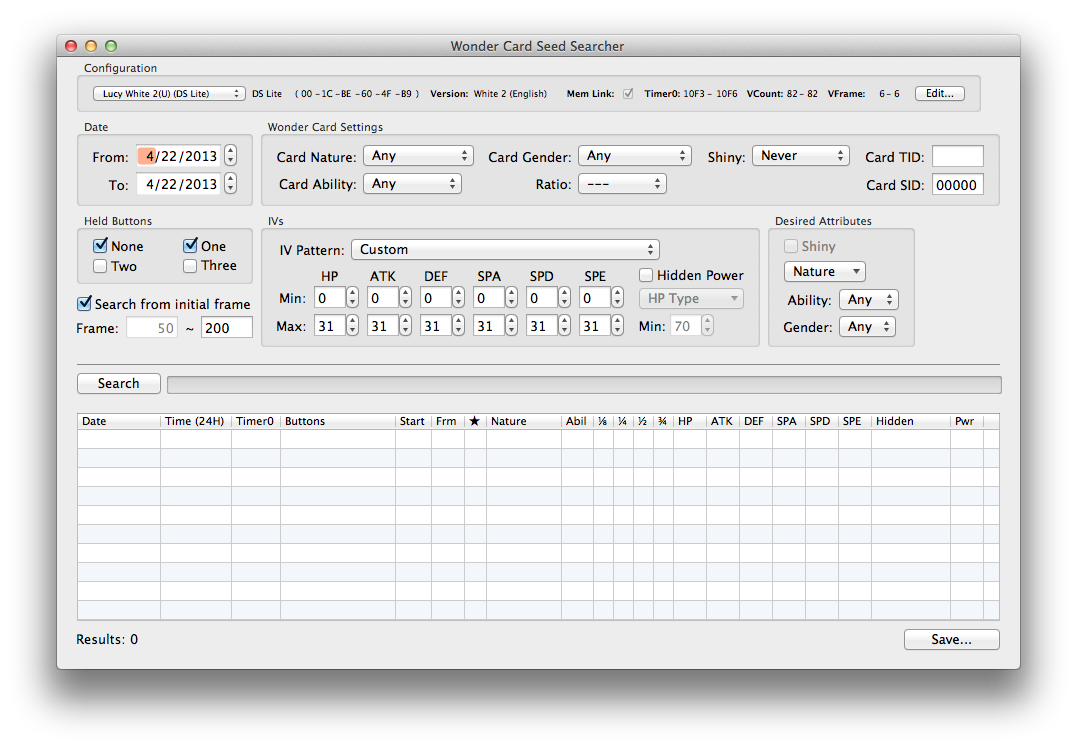
IVs and Held Buttons should be self-explanatory by now. What confuses people most is the section titled Wonder Card Settings. Though not always the case, certain Wondercards do have specific set parameters, which may sometimes include set IVs, set nature, gender, and shininess. What Wonder Card Settings does with regard to this is ensure that the program searches for seeds based on what the Wondercard received states. It is important to verify the specifications of the Wondercard you received as putting in the improper settings will yield incorrect results. In this example we will be going for a WIN2013 Keldeo. 
Double click on any seed you feel comfortable with to open up the Wonder Card Seed Inspector Window. 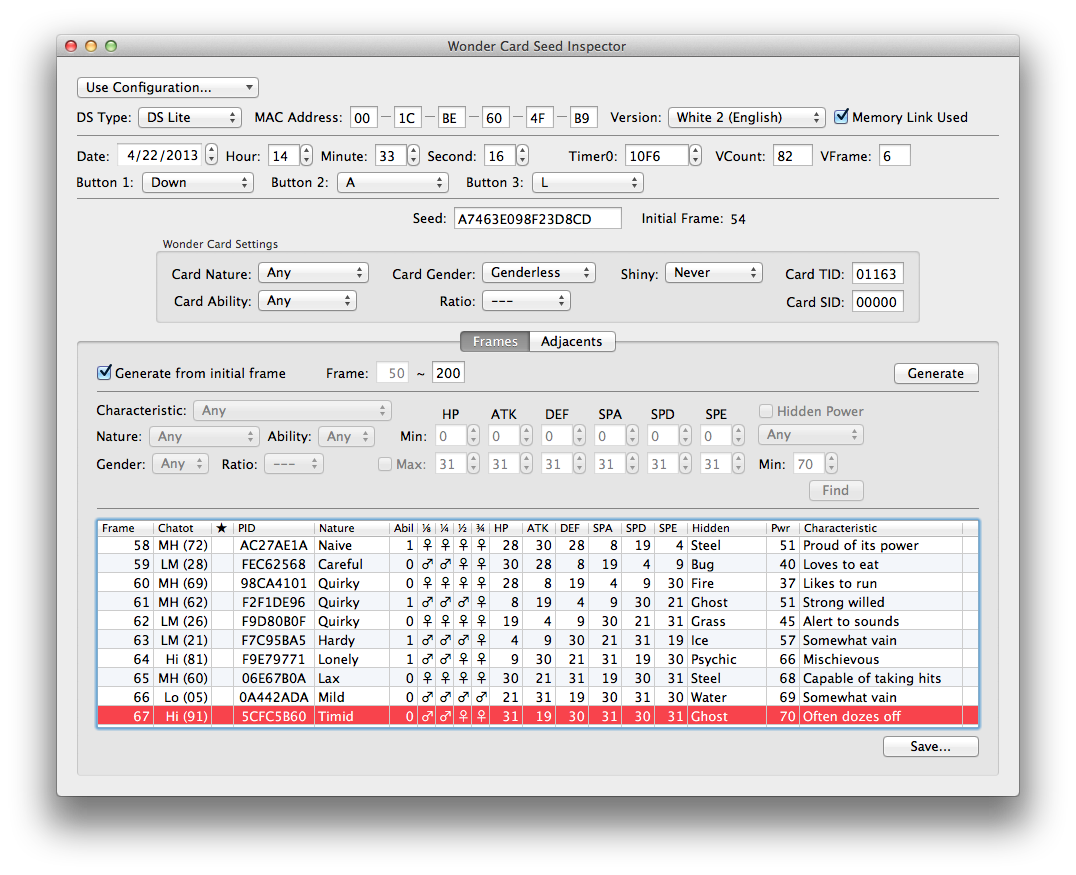
This window will be based on the data you input in the previous window. Your target frame will be highlighted while your initial frame will be listed next to the seed. In-game, you should come with at least one Chatot with Chatter to advance the PID frame (and remember that in this case, that's all that matters). You should also be saved in a Pokémon Center where there are no WNPCs. In Pokemon Black and White, Nimbasa City is the earliest choice with the Elite 4 Pokémon Center a secondary choice. Meanwhile, Pokemon Black 2 and White 2 has Castelia City earliest with Nimbasa City serving as a second choice. Now that you're set, the procedure is much the same as previous forms of RNG abuse. Start your game at the chosen time, holding down the keypresses of your seed. Once you regain control of your character (making sure not to turn on the C-Gear), advance to the target frame. Remember: Target Frame - Initial Frame = # of Advancements Talk to the Delivery Man when you reach your Target Frame to receive your Pokemon. If you find out you did not get it, use the Adjacents Tab to find out what frame/Timer0 you hit. 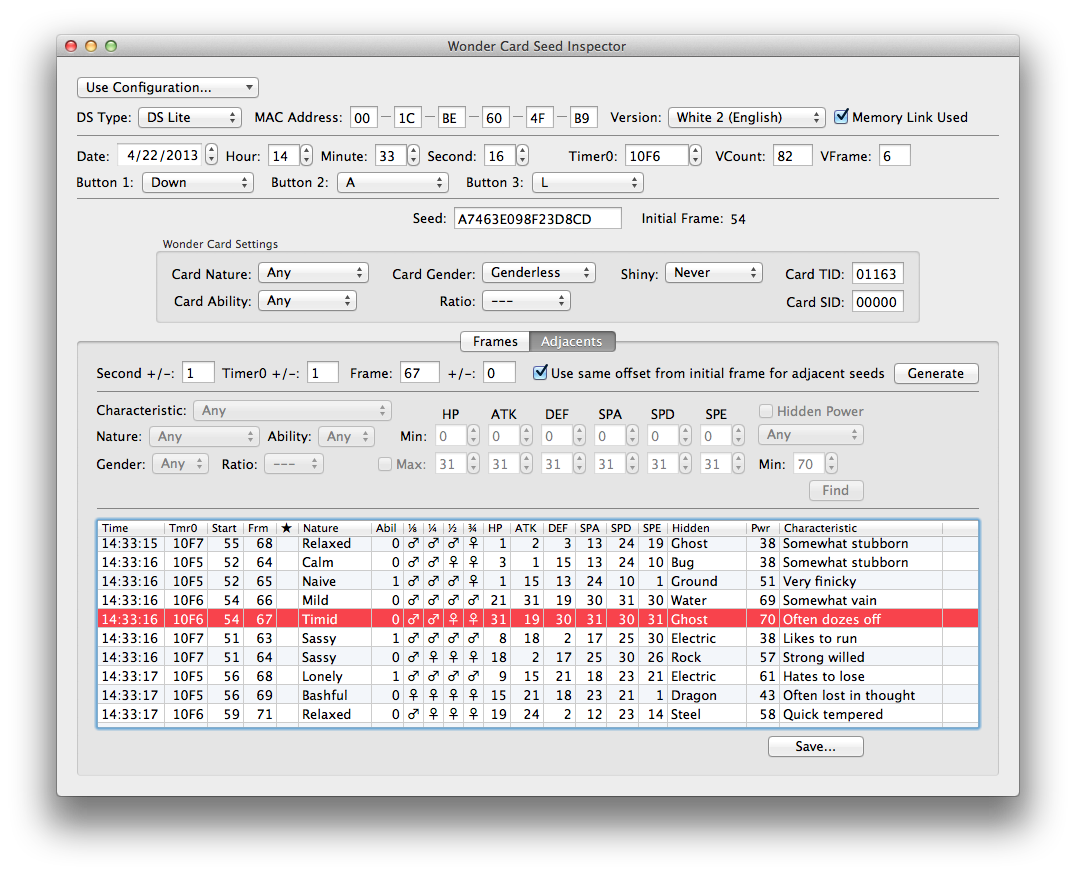
As you can see, PPRNG lists nature, characteristic, and IVs, so this can be helpful in narrowing down results from the Adjacents Tab. |